Runme on VS Code
Runme strives to provide a great experience right out of the box. In this section we we will guide you through making the most of your markdown docs with Runme.
Install Runme VS Code extension
If you haven't already installed Runme for VS Code, please complete the steps in installation before proceeding.
Your First Runme
You can get started in one click with the following badge:
Simply follow the instructions provided by VS Code to get started in seconds:
Alternatively, clone into the Example Repo to follow along! This guide follows the node-streams sub-package - simply open its README file and runme will do the rest.
If you want to use Runme outside VS Code, you can install the CLI standalone. Learn about the Runme CLI
Running Scripts
Runme automatically converts all bash codeblocks in your README into runnable scripts. This makes getting started with a new project a breeze - say goodbye to annoying copy-and-pasting!
To run a script, click the Run button on its left-hand side. Start by running the first script under "Prerequisites":
As you can see, we have downloaded the business_data.csv file, which contains business statistics about New Zealand in the years 2000-2021. It's a pretty big file!
Warning!
For the set-up script to work, you'll need to have the curl and unzip utilities installed. The remaining scripts will also require node.js to be installed. In a future version of Runme, we plan to provide a solution to help you manage these dependencies from within the notebook. Stay tuned!
Command Output
Scroll down to the Examples section of the notebook. From there, try running Steps 1 and 2.
If everything goes right, you should get an output like the following:
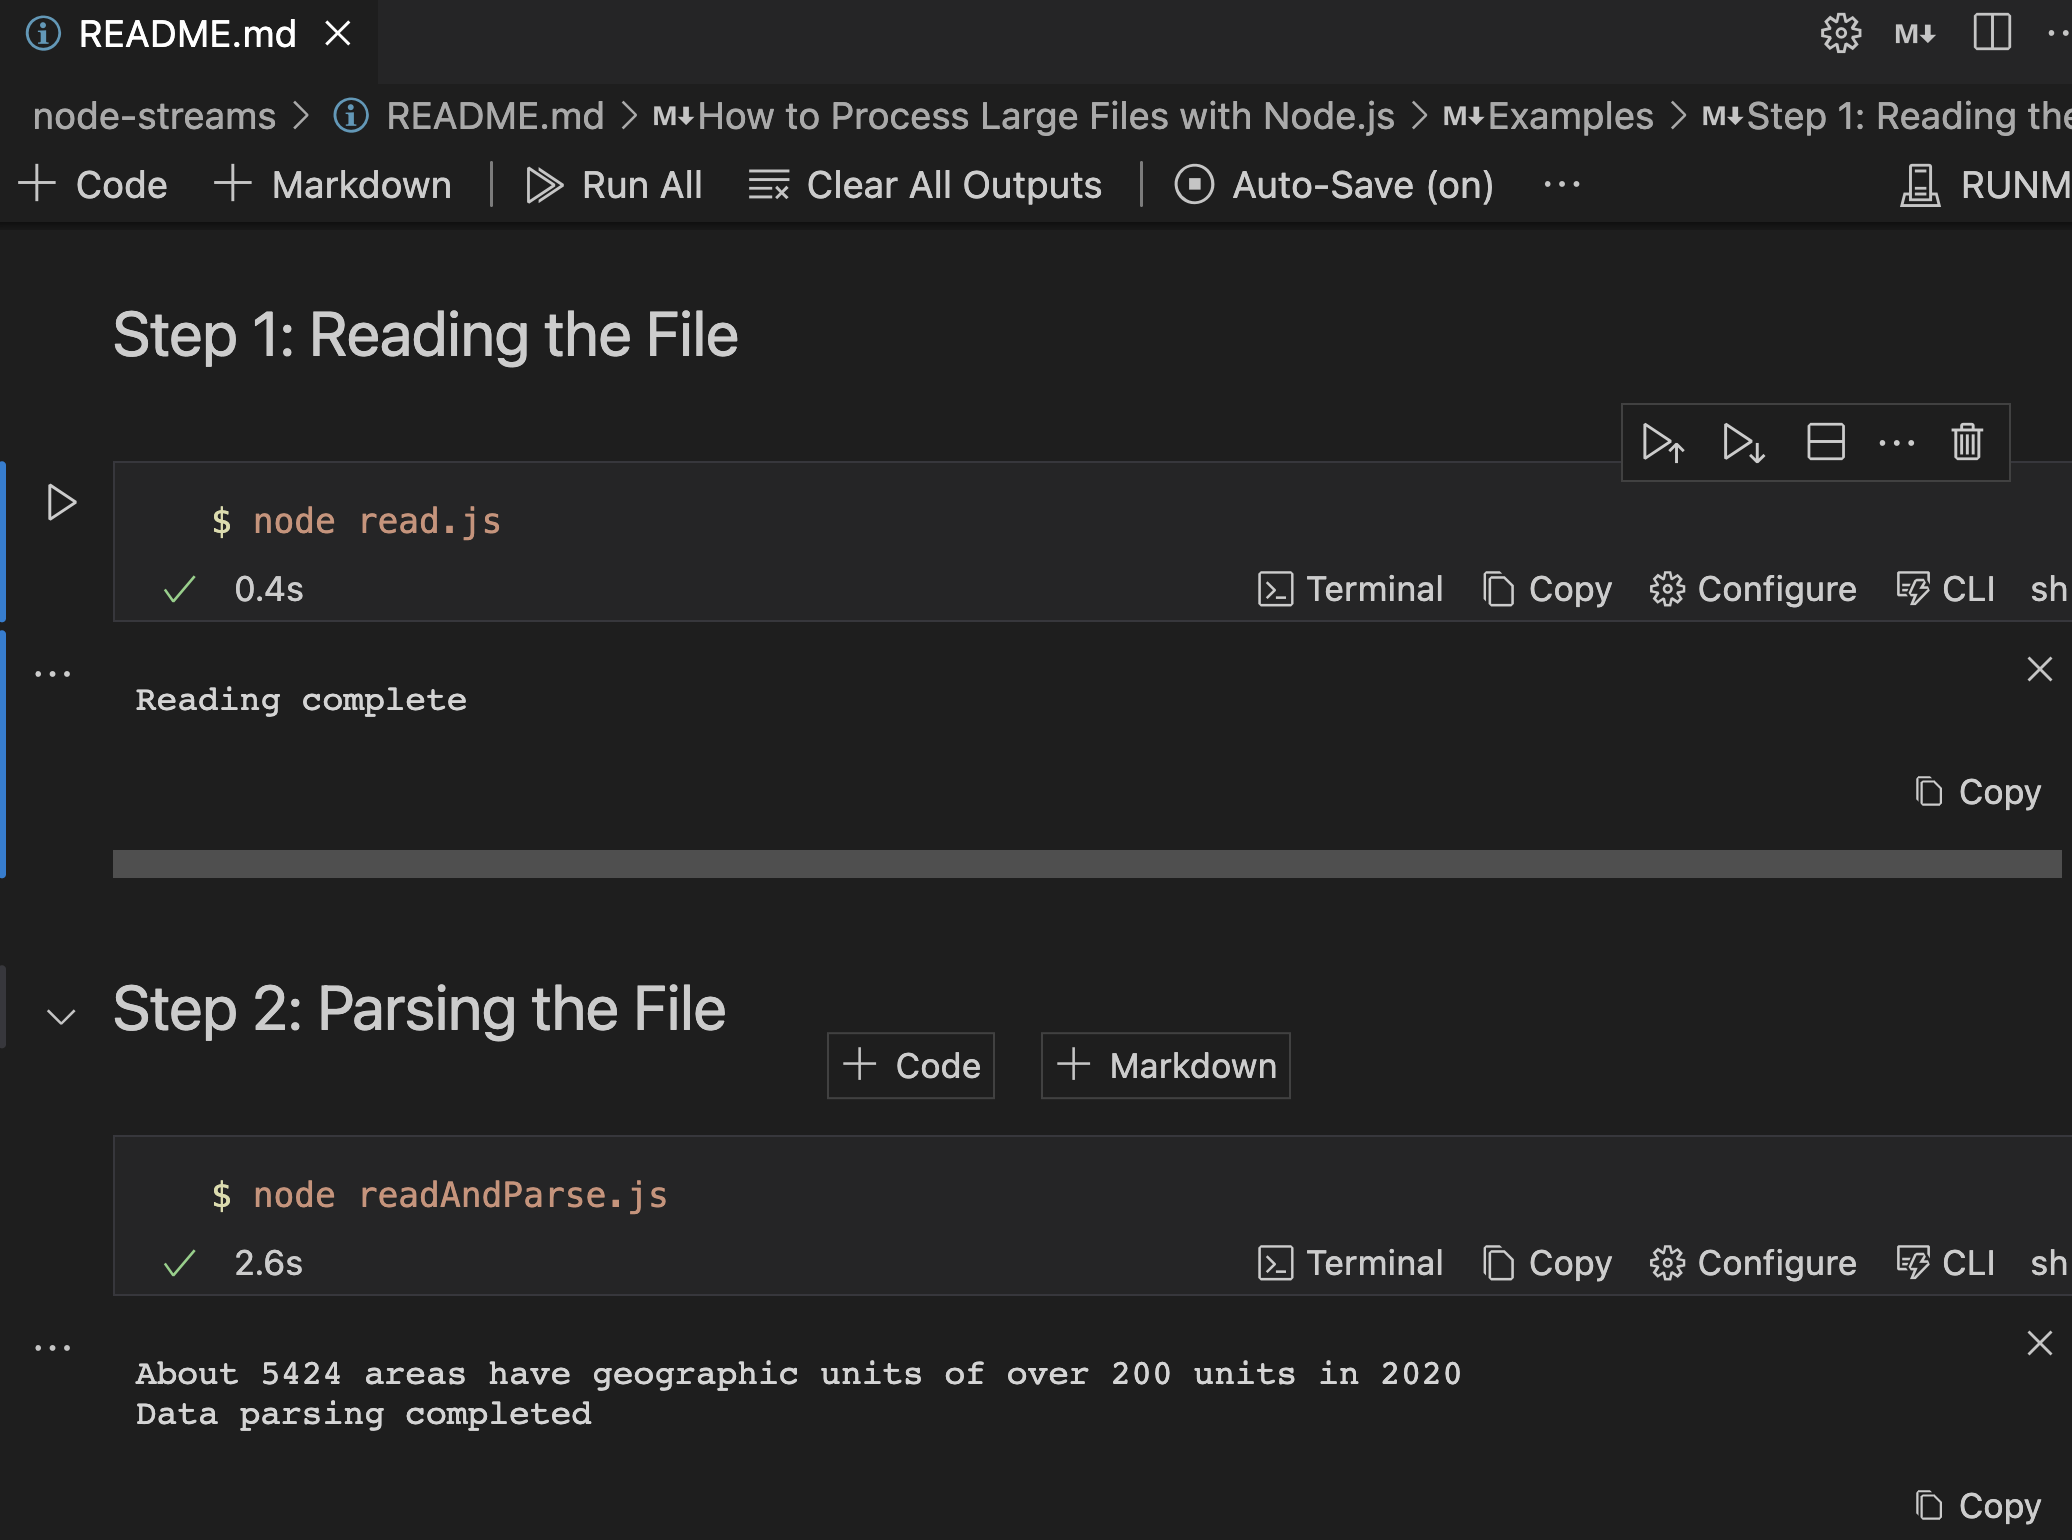
Great! You can see the terminal output from each command beneath its respective cell. Our Node.JS script was able to parse that massive file with no problems!
Successful Execution
Wondering how you know when a command is finished executing? Look out for the checkmark in the bottom left:
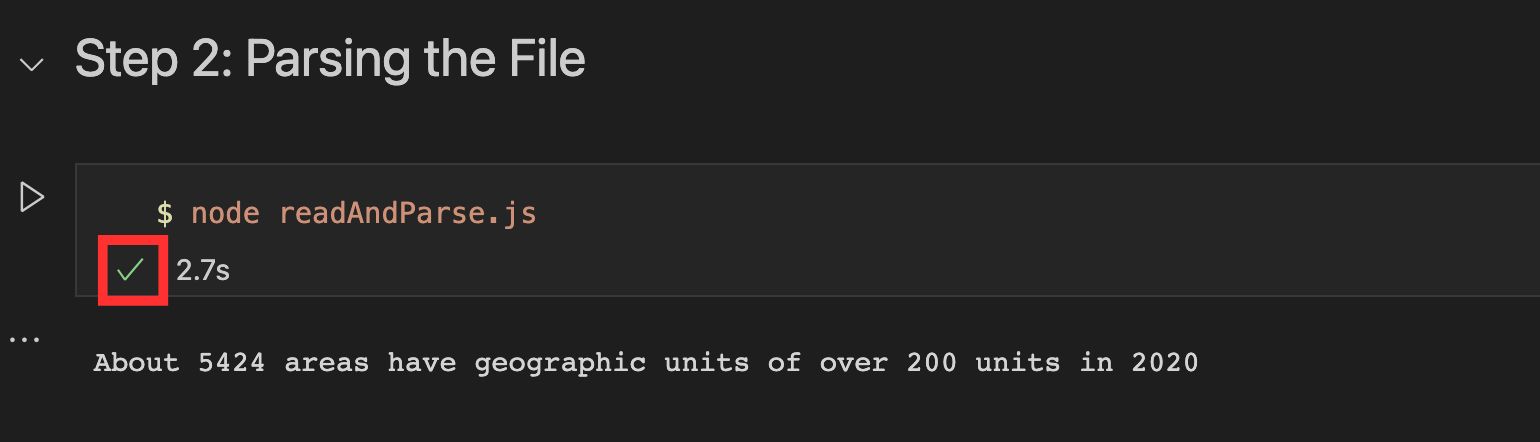
If the command fails, it will be an "X" mark instead!
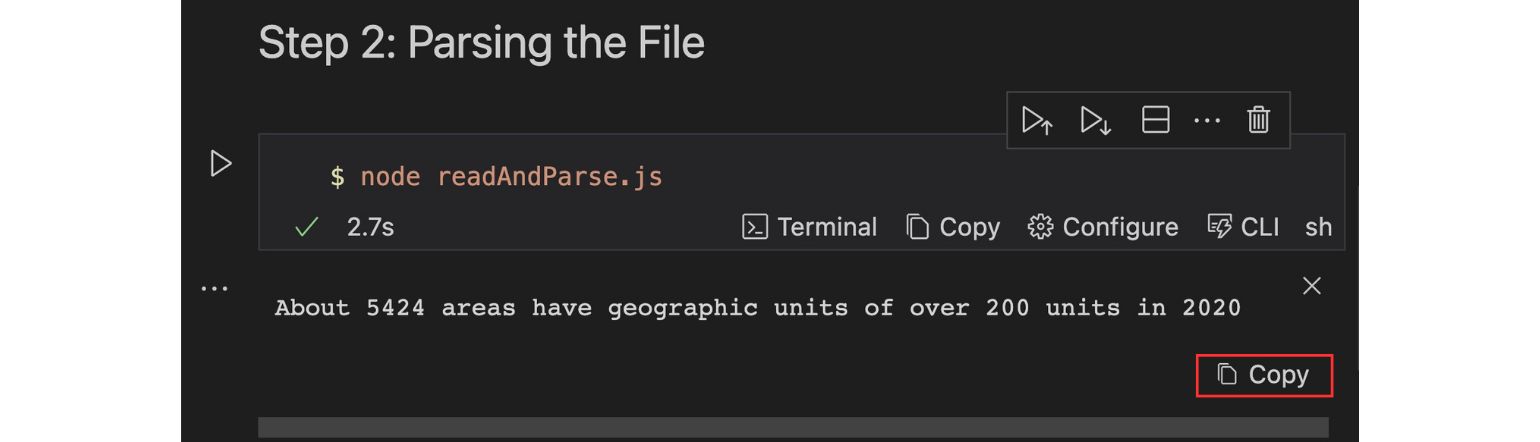
Copying Output
Runme provides a handy "Copy" button to easily copy the output of a command!
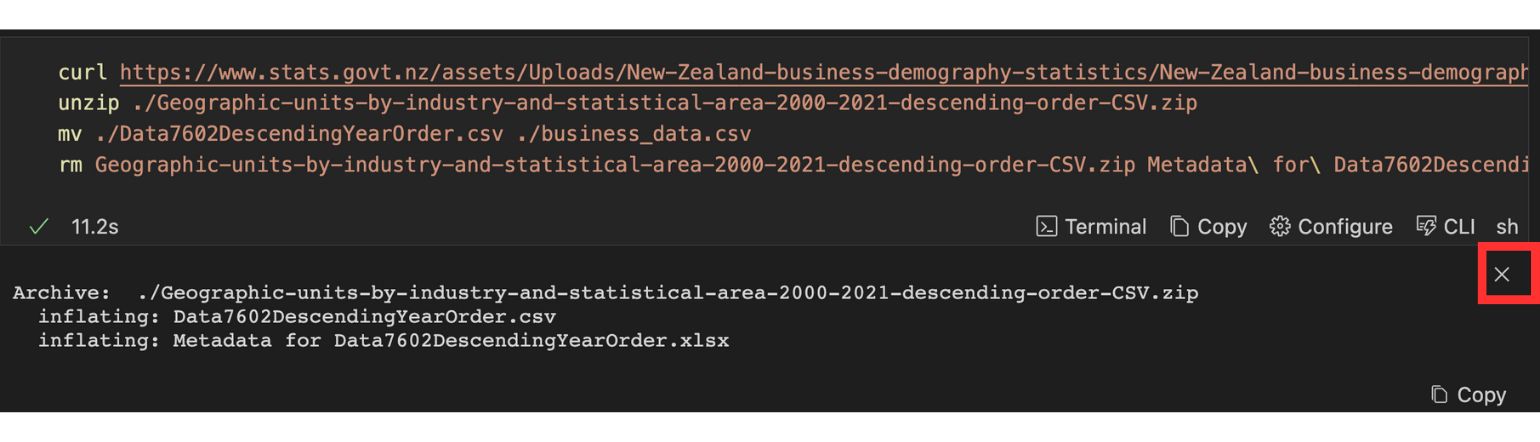
Clearing Output
Sometimes, the output of a command can clutter up the screen. To prevent this, use the "Clear Cell Outputs" menu option.
Alternatively, select the output and use the Option+Delete shortcut.
Congratulations on running your first Runme notebook! 🎉While you've understood the basics, there's more to discover about Runme's powerful features. Let's get ready to dive deeper.
Runme Editing & Authoring
Runme combines running, viewing, and editing into one experience.
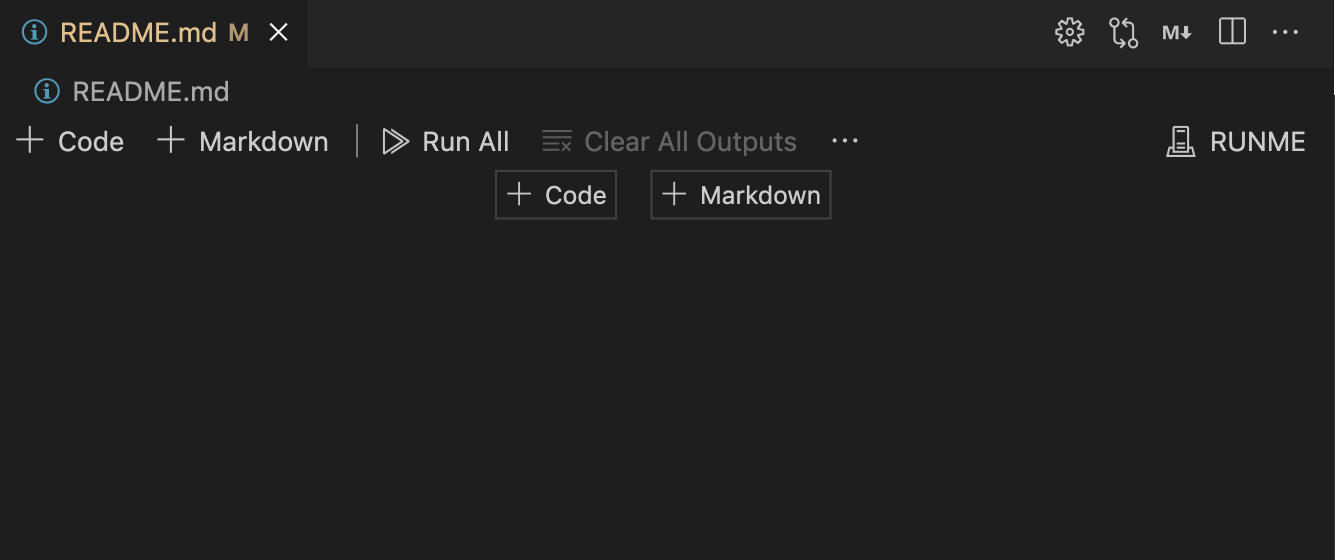
From Scratch
Start by initializing a new project and adding a new README.md file. Alternatively, you can select Runme Notebook from the File->New File menu. When you open it, you should get an empty canvas, like this:
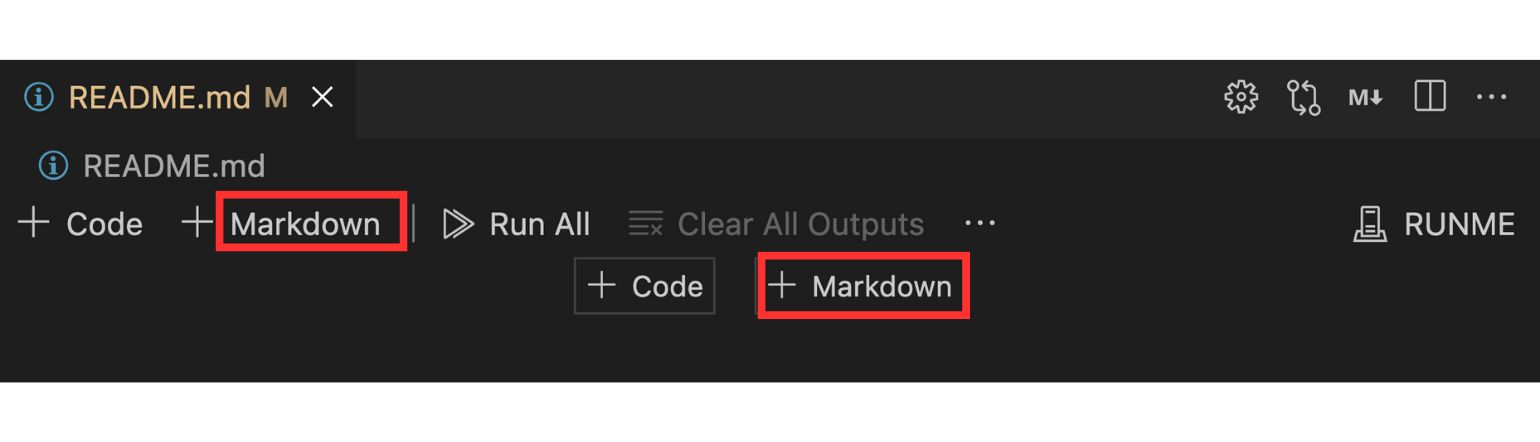
Adding Markdown
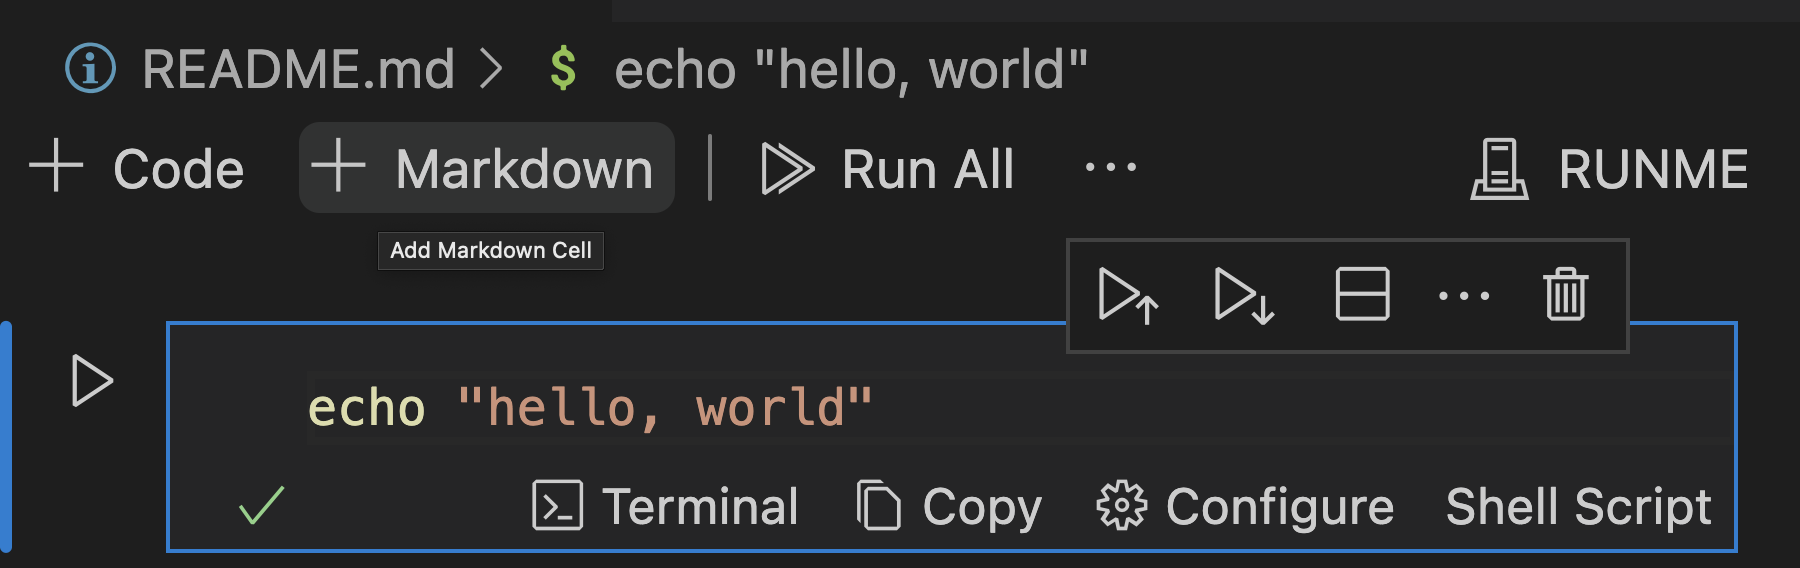
To add a new Markdown section, click the "+ Markdown" button in the top left or center:
You can then edit the markdown block directly:
As shown in the image below, once you're done editing a block, use the Check icon (the one with the checkmark):
![]()
To edit the cell again, use the Edit Cell icon:

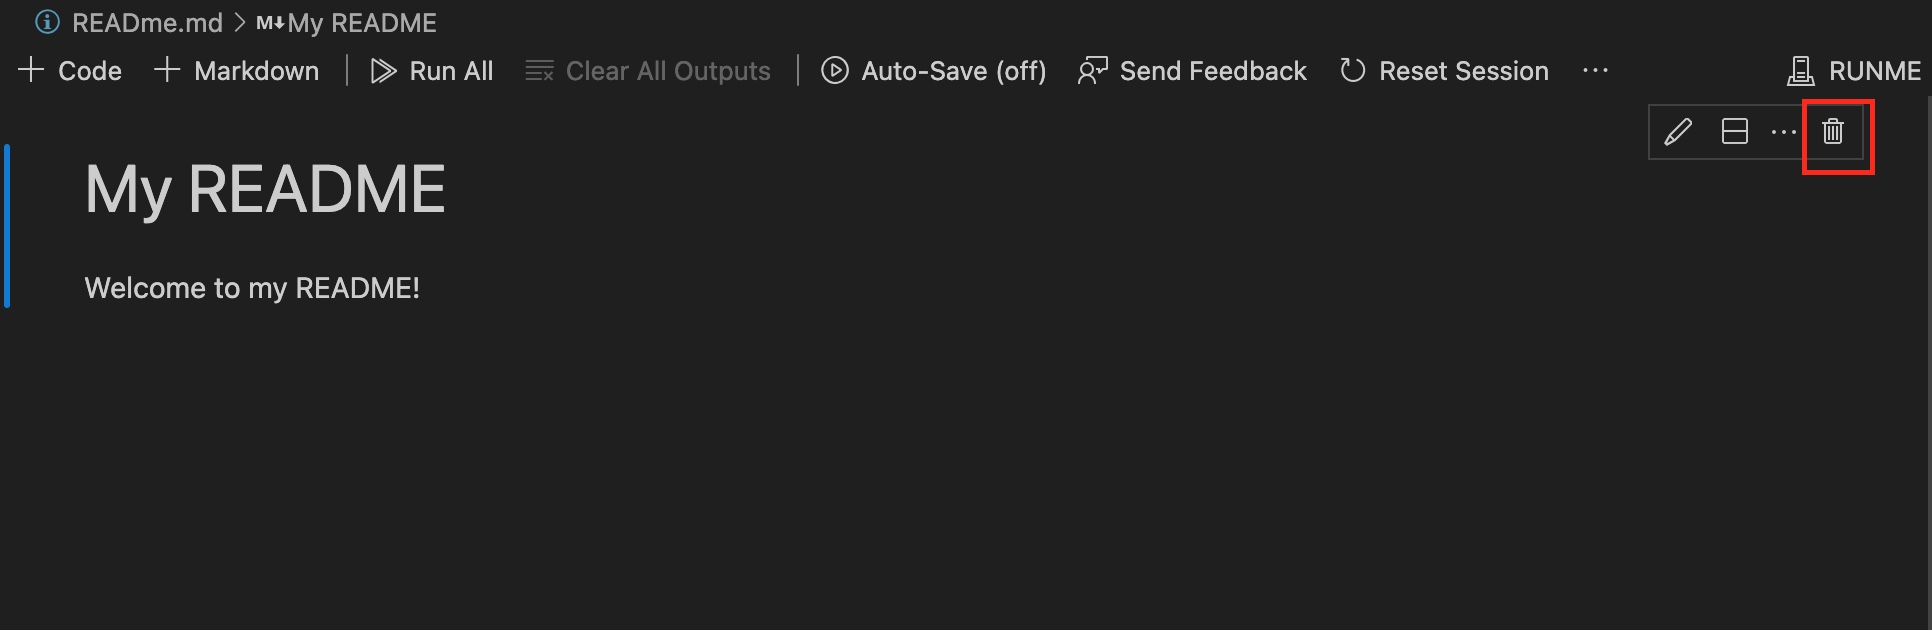
Finally, you can remove a cell at any time using the Delete Cell icon:
Note that the usual shortcuts (like Ctrl + Z) work perfectly in this environment too!
Sidenote
You can use ESC or Ctrl+Enter to quickly finish editing a cell.
You can use Enter on its own to start editing a selected cell.
You can also use CMD+Delete to quickly remove a cell.
Adding Code
Code cell blocks work similarly to Markdown blocks, and can be edited/saved/deleted in the same way.
To create a new code block, use the + Code button in the top left or center:

You can then freely add runnable code:
Interactive Mode
By default, our script will run in “Interactive Mode”. This will run the script in a separate terminal window, rather than in the notebook itself.
As the name implies, the interactive mode is great for interactive scripts. Our script, however, prints output and has no interactivity whatsoever.
Wouldn’t it be great to see the output in the terminal?
If we just try to run this as it is, we will experience the following:
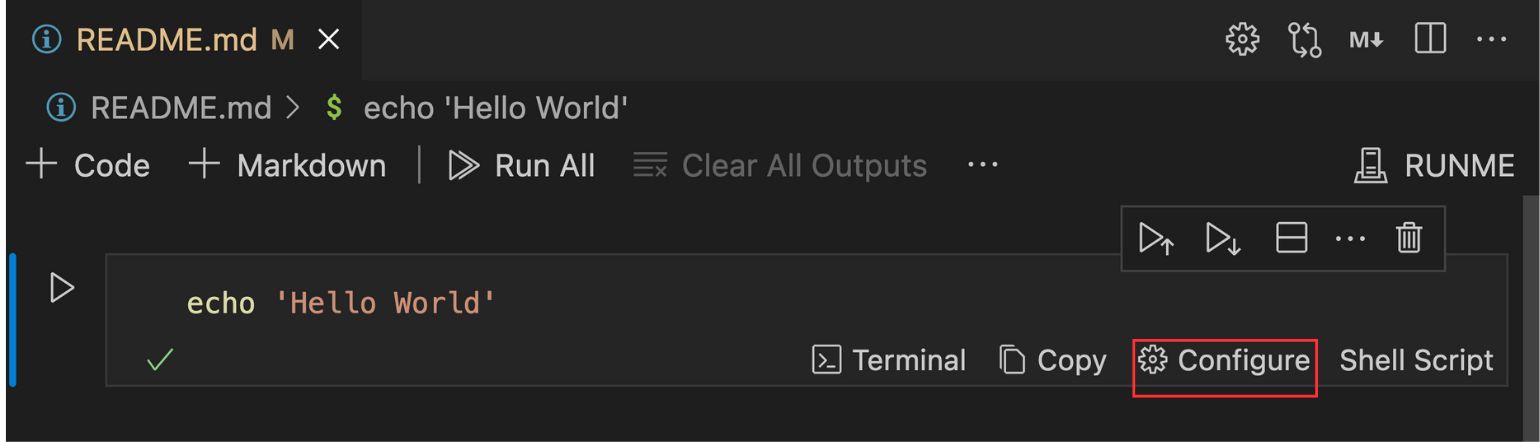
To fix this easily, we'll need to access the Configure foldout by clicking on the Configure button:
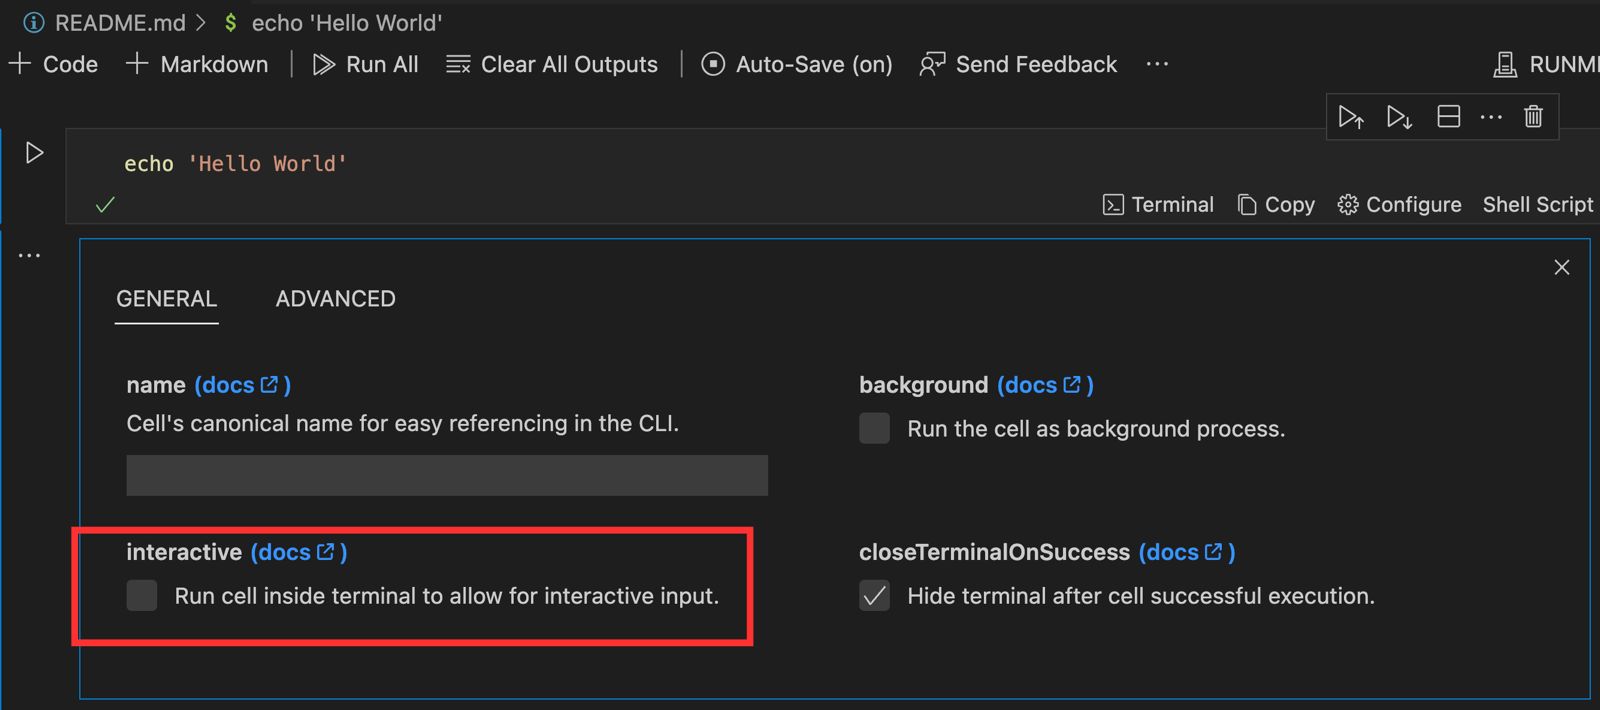
From here, we can easily disable interactive mode:
Our code block will now display its output exactly as below:
Frontmatter
Frontmatter is a common occurrence in markdown documents. At the moment Runme won’t break your frontmatter, but we also haven’t yet implemented an interface for managing or editing it from within the notebook. Stay tuned!
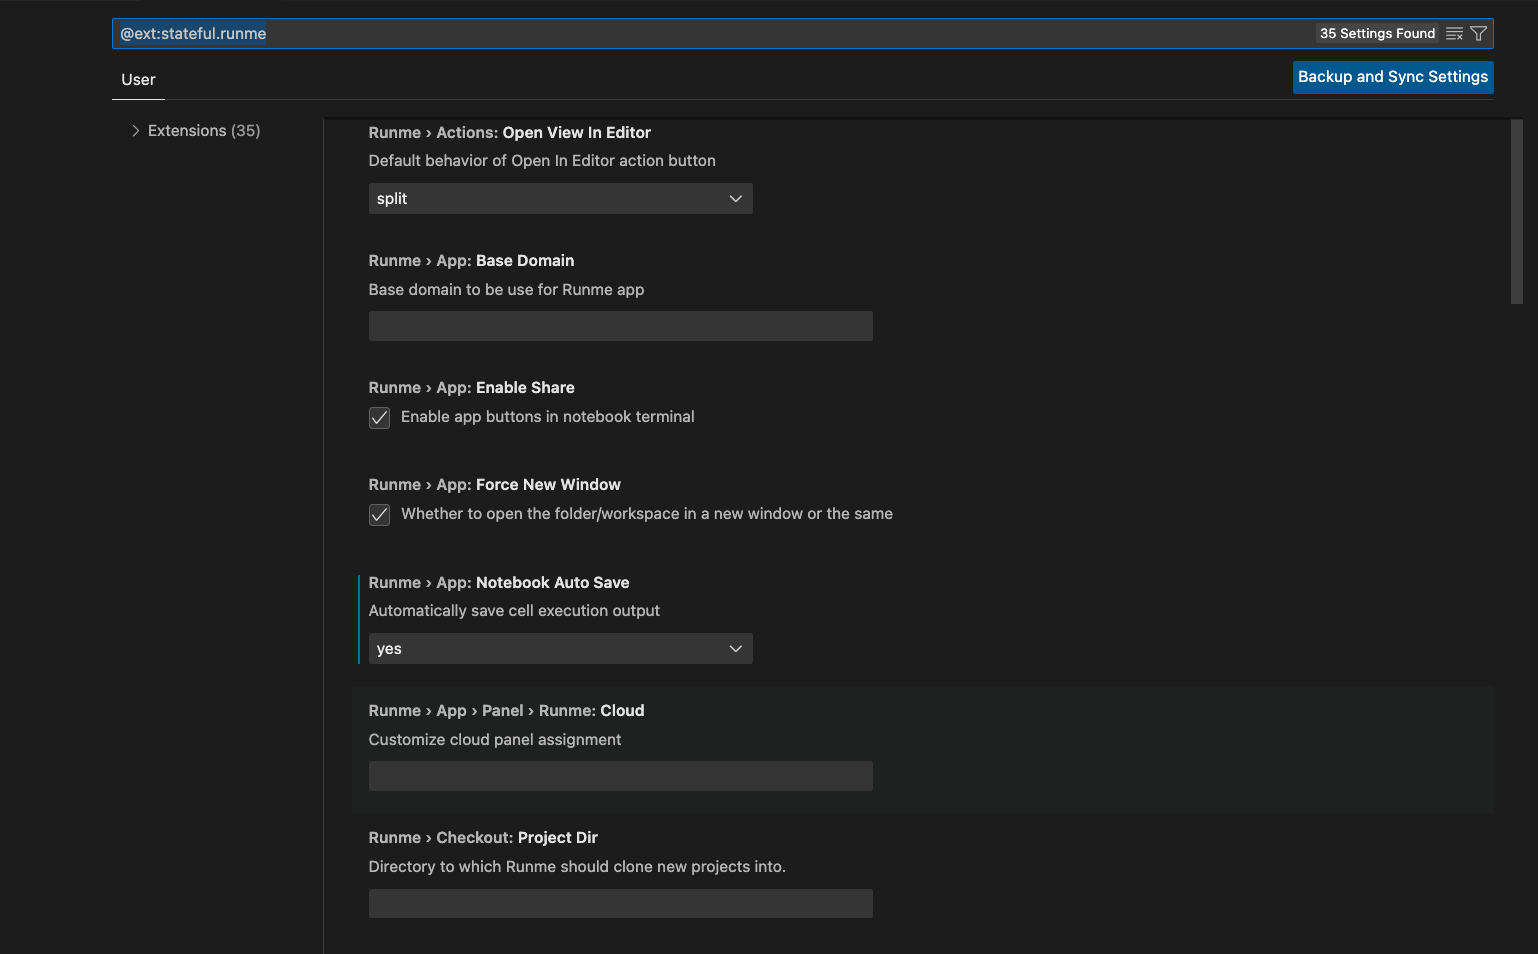
Runme Settings for VS Code
In the VS Code settings, several configurable settings influence general Runme behavior and enable experimental functionality.
Background Processes
Suppose that you have a script that intends to run in the background (like a dev watcher). To simulate this, we'll use the script sleep 10000.
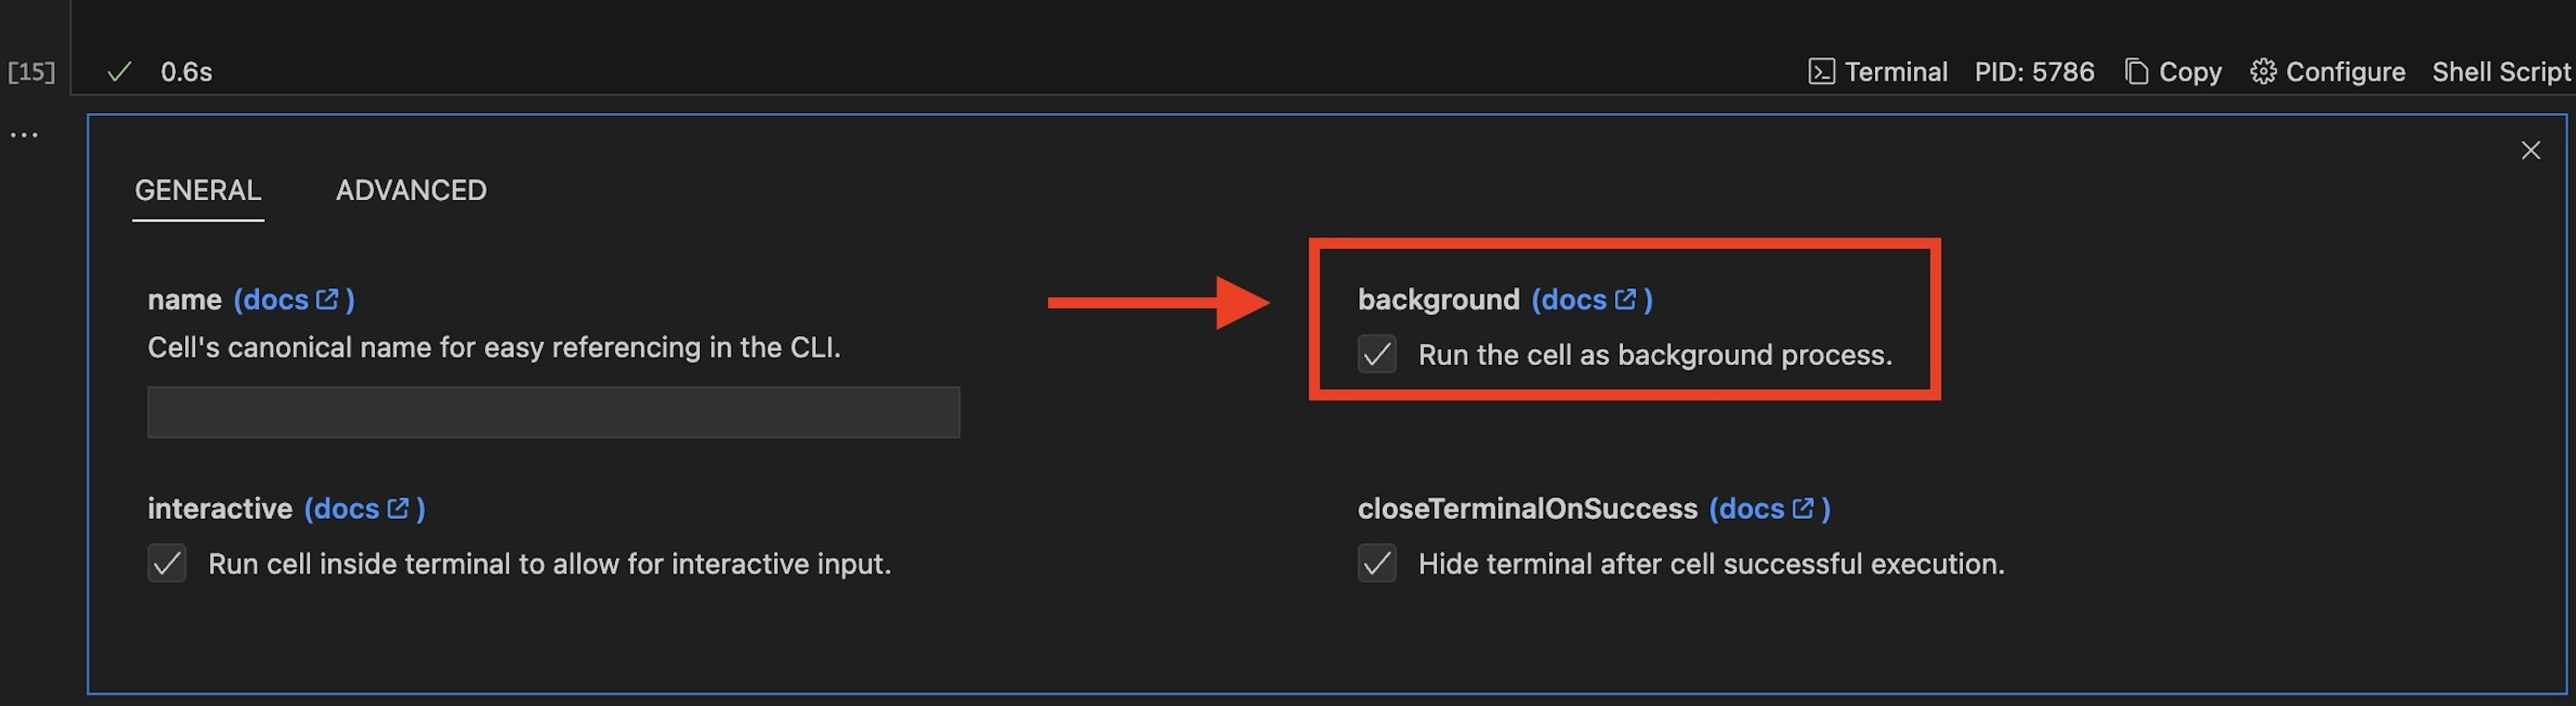
You could run this like other scripts, however, Runme supports a special "Background" mode for these kinds of tasks. This mode gives special tools to help manage them!
You can enable Background mode in the same foldout you configured Interactive mode:
Warning!
Background mode only works in tandem with Interactive mode!
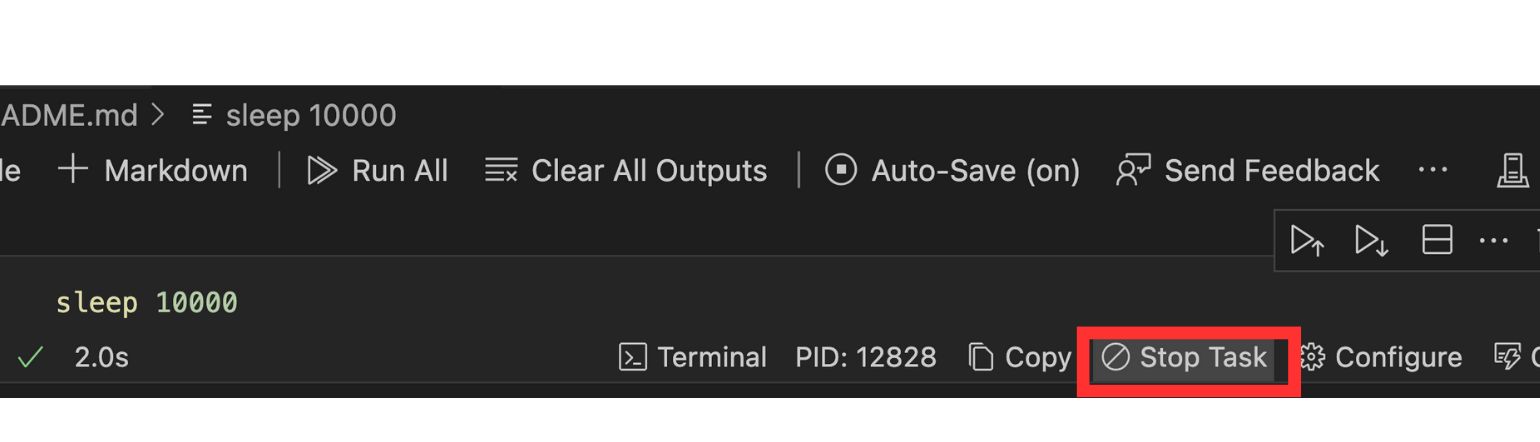
Now, when you run the script, it will be part of a long-running terminal session:
As is demonstrated by the previous video, background tasks are delineated by the "Background Task" label:
Background Task also has a Stop Task button to end their execution long after starting:
Markdown Script Metadata
Configuration fields like background and interactive are set using markdown's script metadata feature:

Warning!
Be sure not to strip this data if you want to use it!
tets
Great work!
Hopefully, you now feel comfortable making your own Runme notebooks! If you run into any issues please file a ticket or tell us about it on Discord.
Please see the integrations section to see more sophisticated use cases of Runme or learn about all thecell configuration options available to streamline the reading and running experience.
Useful Tips & Tricks
How to ensure Runme is working properly?
It’s easy. Open your project README file and see it is now opened as a Notebook file! Check that shell commands are now rendered as runnable blocks. That’s pretty nice. Finally, you’re seeing the future of running your README files now. We bet you won’t want to return to plain markdown viewers.
How to open a README file as a markdown file?
Sometimes, you will want to see the file as a regular markdown file, and you don’t need to disable or uninstall Runme. You can right-click on the file and pick one of the options displayed when clicking Open with. You can select the built-in text editor or markdown preview for such cases.
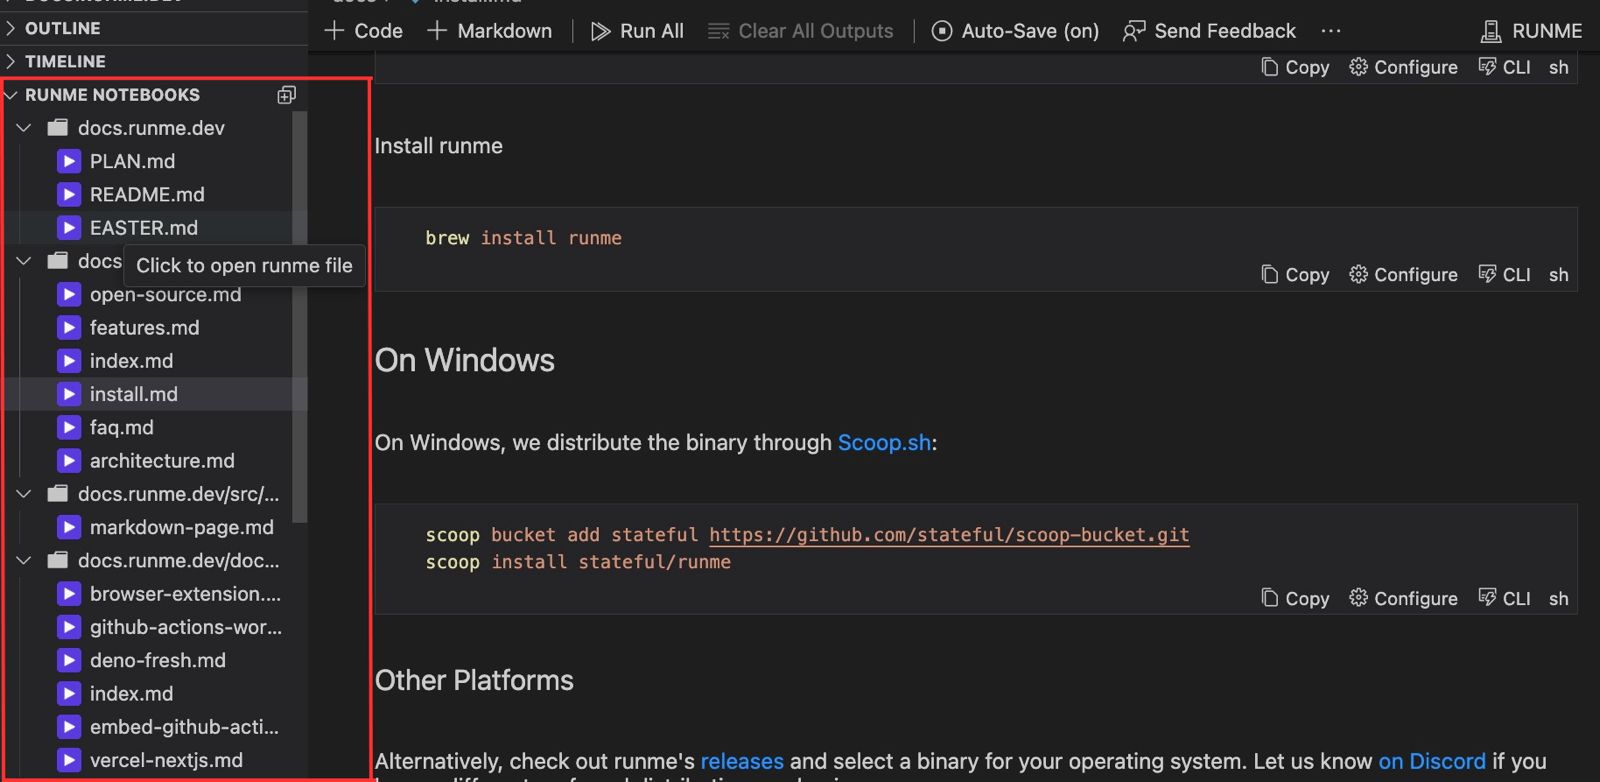
Notebook Explorer
To help you navigate the Markdown files in your project, Runme adds a super handy Runme Notebooks panel. Clicking any markdown file will open it in your code editor view: